Adding an image to your footer in Shopify is a great way to add some visual interest to your store and make it more unique. There are a few different ways that you can add an image to your footer, depending on what look you’re going for. Here are a few tips on how to add an image to your footer in Shopify.
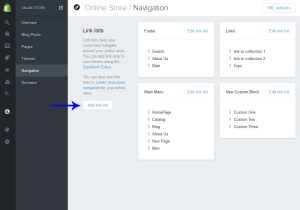
- Log in to your Shopify admin and go to Online Store > Themes
- Find the theme you want to edit and click Actions > Edit code
- In the Assets directory, click Add a new asset
- Choose the image file you’d like to upload and click Open
- Click Save at the top of the page when you’re done uploading images
How To Add A Logo In Shopify Footer
How Do You Add a Background Image to a Footer in Shopify?
It’s pretty easy to add a background image to your footer in Shopify. Just follow these simple steps:
1. Log in to your Shopify admin and go to Online Store > Themes.
2. Find the theme you want to edit and click Customize.
3. In the Theme Settings section, click Footer > Edit HTML/CSS.
4. In the Assets folder, click Add a new asset.
Upload your image file from your computer. Make sure that you select AllShopifyThemes from the drop-down menu next to where it says Theme Asset Location before you click Save.
5Once the image is uploaded, go back to the Layout folder and open up footer.liquid .
Find the code that looks like this:
{{ ‘footer’ | t }}
And replace it with this:
Be sure to save your changes! And that’s it!
You’ve now successfully added a background image to your footer in Shopify!
How Do I Add an Image to the Footer in Shopify Brooklyn?
Adding an image to the footer in Shopify Brooklyn is a simple process that can be completed in just a few minutes. To start, simply log into your Shopify account and go to the “Themes” section of your dashboard. Next, click on the “Customize Theme” button for the Brooklyn theme.
Once you are in the customization interface, you will want to click on the “Footer” tab near the top of the page. In this section, you will see an option to add an image under the “Logo & Copyright” heading. Simply click on the “Upload Image” button and select the image you would like to use from your computer.
After adding your image, be sure to save your changes by clicking on the “Save” button at the top of the customization interface. Your new image should now appear in the footer of your Shopify store!
How Do I Edit an Image Footer in Shopify?
If you want to edit the image in your Shopify store’s footer, there are a few things you’ll need to do. First, open up the “Theme Editor” from your Shopify admin. Then, click on “Footer” and find the “Settings” tab.
From here, you can upload a new image or choose one from your existing files. Once you’ve made your changes, be sure to save them by clicking the “Save” button.
How Do I Embed an Image in Shopify?
If you want to add an image to your Shopify store, there are a few things you need to do. First, you need to find the image you want to use. You can do this by searching for it on Google Images or another image search engine.
Once you’ve found the image, right-click on it and select “Copy Image.”
Next, go to your Shopify admin and click “Settings.” Under “General,” click “Files.”
On the “Files” page, click “Upload files.” In the window that pops up, click “Choose file” and select the image you copied earlier. Finally, click “Upload file.”
Your image will now be uploaded to your Shopify store and embedded in your product pages.

Credit: flockler.com
Add Icons to Footer Shopify
Adding icons to your Shopify footer is a great way to add some visual interest to your store and make it more engaging for visitors. There are a few different ways you can go about doing this, and we’ll walk you through each method so you can choose the one that’s best for you.
One option is to use a Shopify app like Icons8.
This app allows you to select from over 1 million icons and then customize them to match your store’s branding. Once you’ve found the perfect icons, simply add them to your footer code and they will appear on your site.
Another option is to find free icon sets online and then upload them to your Shopify theme.
A quick Google search will turn up plenty of results, or you can check out places like FreePik or FlatIcon. Once you have your icons, simply add the code snippet provided by the service into your footer template file and they will be displayed on your site.
Finally, if you’re feeling really creative, you can always create your own custom icons using an image editor like Photoshop or Illustrator.
Simply create the icon images that you want and then upload them into the “Assets” section of your Shopify admin panel. From there, you can add them to your footer code just like any other icon set.
No matter which method you choose, adding icons to your Shopify footer is a great way to spruce up your store and make it more visually appealing for visitors.
So get creative and have fun with it!
Conclusion
Adding an image to the footer of your Shopify store is a great way to personalize your site and make it stand out from the competition. There are a few different ways to do this, and the method you choose will depend on the type of image you want to use.
If you want to use a static image, such as a logo or banner, you can upload it directly to the Theme Editor in the “Assets” section.
Once it’s uploaded, you can add it to your footer by dragging and dropping it into the appropriate spot.
If you want to use an animated GIF in your footer, you’ll need to first upload it to a third-party hosting service like Giphy or Imgur. Then, copy the URL for the image and paste it into the “Image URL” field in the Theme Editor.
Finally, if you want to use a video in your footer, you’ll need to first upload it to YouTube or Vimeo and then copy its embed code. Paste that code into the “Embed Code” field in the Theme Editor (under “Advanced Settings”).
Regardless of which method you choose, be sure to save your changes before exiting the Theme Editor!